Create Conversive Buttons
Overview of Conversive Buttons
With embedded messaging, you can get high-intent inbound conversations from everywhere and create a conversation-first experience. Embedded messaging guides prospects throughout the conversation path from everywhere by adding messaging entry point to your emails, web pages, hoardings, pamphlets, and much more. direct and personal conversations when your prospects and customers need you the most – that is when they are seeking more information, making up their minds, and evaluating service providers like you.
SMS-Magic makes it easy for you to connect with your audience through personalized messaging via their preferred channels, including text messaging, WhatsApp, and Facebook Messenger. Conversive buttons is the very first step towards embedded messaging. Conversive buttons help businesses to deliver value faster by engaging with customers across the phases of attracting, engaging, onboarding, and support.
Companies would be enabled to invite customers to converse with them across websites, SMS & WhatsApp channels. This will help them get started with messaging quickly and get maximum value from it by being reachable to their customers on their favorite messaging channels.
How to Configure Conversive Buttons
To configure conversive buttons follow the steps below:
- Login to the Customer Portal using valid credentials, and the following home page of the Portal will appear:
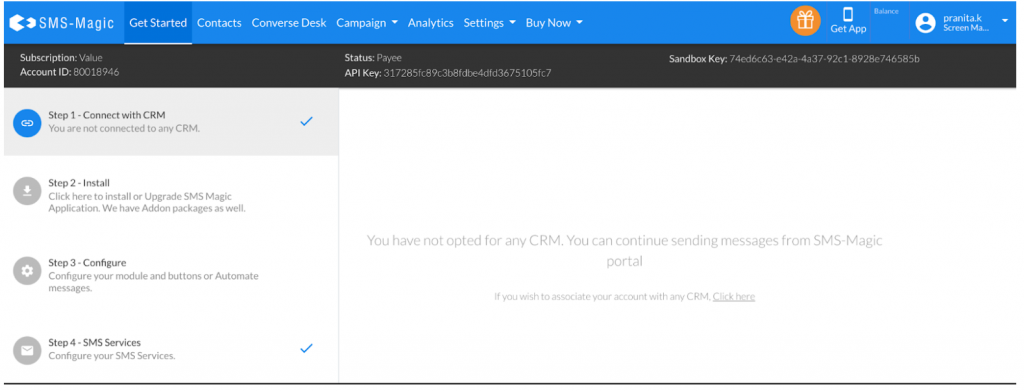
The conversive buttons option will be available in the ‘Settings’ drop-down list only to the users to whom the relevant license is assigned.
- Click on the ‘Settings’ drop-down as shown in the image below to access the conversive buttons settings section:
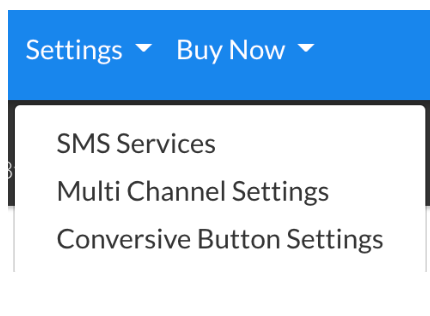
- The conversive buttons settings page will appear:
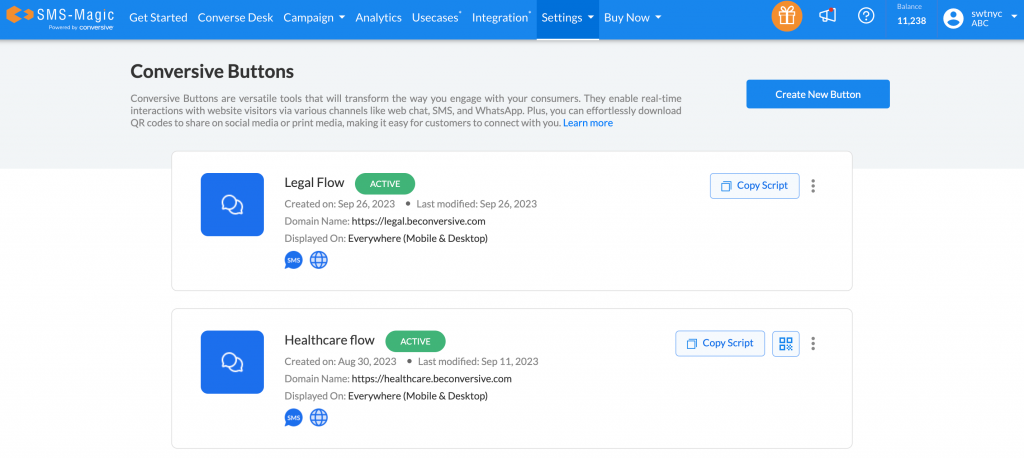
Here you can edit or deactivate the conversion buttons that you might have already created, by clicking on the three dots on the right of each button.
- Click on the ‘Create New’ button and the following page will appear:
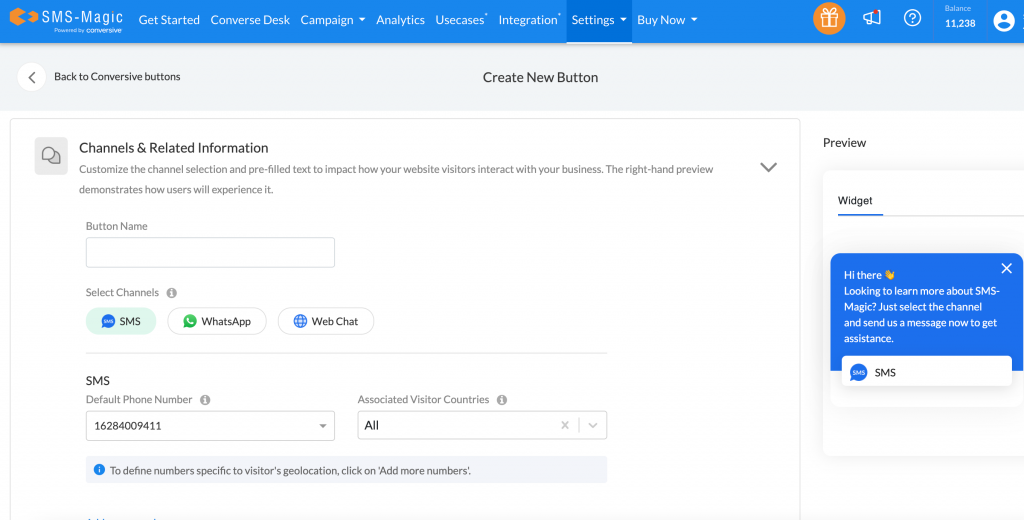
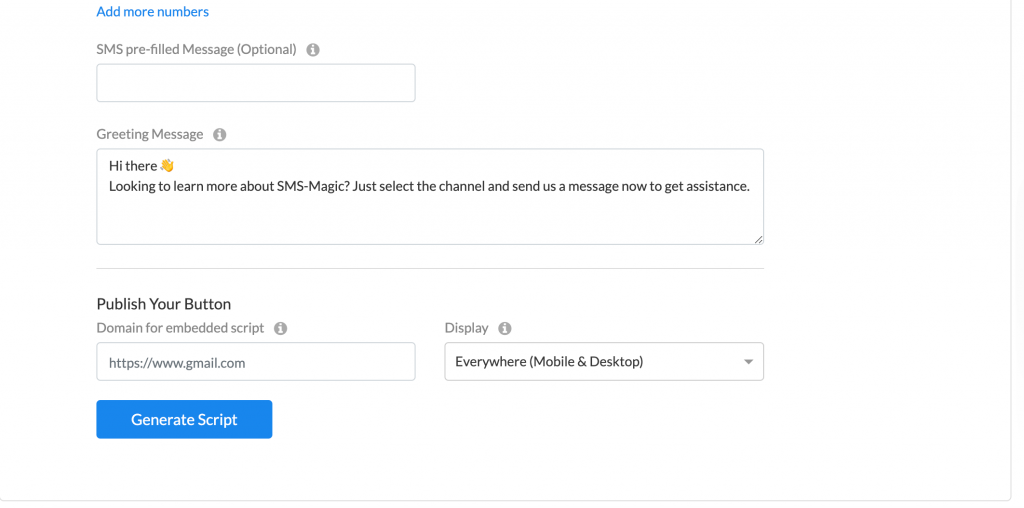

The new conversive button creation section is divided into two parts namely, Channel & Related Information and Advanced Settings. The Channel & Related Information section is mandatory, whereas the Advanced Settings section is optional. The Button Preview section on the right gives a preview of the button as per your configuration.
Channels & Related Information section
- Enter the button name (combination of alphanumeric and special characters) in the ‘Button Name’ field
- Select one or more channels that you want to display with the conversive button. You can opt to disable the channels. Once you select the channels, they will appear in the preview section.
- As per the channels selected, enter the relevant information in channel-specific fields
- In the case of SMS as the channel, the default Sender ID will be shown. Select the associated visitor countries. We have 1 Sender ID which will be selected as the default Sender ID for all locations and we can add more Sender IDs country-wise. The SMS pre-filled message is nothing but the keyword or phrase that you want your visitors to start a conversation with, for instance, ‘Hi’, ‘Hello’, etc.
- For WhatsApp, there is no associated visitor countries selection option. The WhatsApp pre-filled message is nothing but the first keyword that you use to start your conversation, for instance, ‘Hi’, ‘Hello’, etc.
- Enter a greeting message that you want to be displayed to the user with the conversive button
- Under the ‘Publish Your Button’ section, enter the domain for the embedded script. The domain is nothing but the website where conversive buttons will be hosted. If the main domain URL is added, sub-domains will be covered under it, and the button script can be embedded into sub-domain page URLs.
- The ‘Display’ drop-down indicates on what all devices the conversive button will be displayed, for instance, Desktop, Mobile, or Desktop and Mobile.
- After entering details in all fields, click on the ‘Generate Script’ button. Once the script gets generated, the user needs to copy and paste it into the codebase
(HTML file like index.html). With this, the conversive buttons will be enabled at the location where the script was added to the codebase.
Advanced Settings section
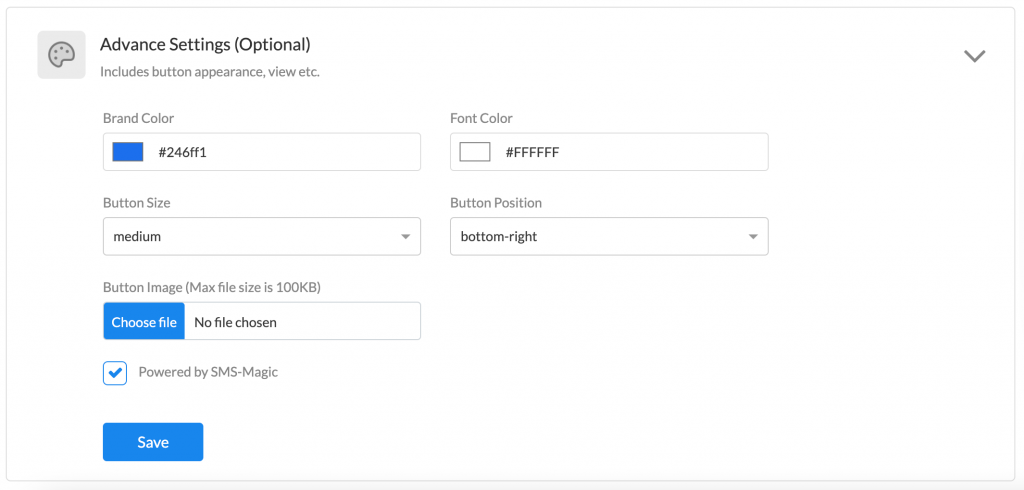
Advanced Settings is an optional section, where the user can configure the button appearance, view, image, font color, brand color, size, and position.
- Click on the ‘Save’ button to save and create the conversive button.


