Creating WhatsApp Templates
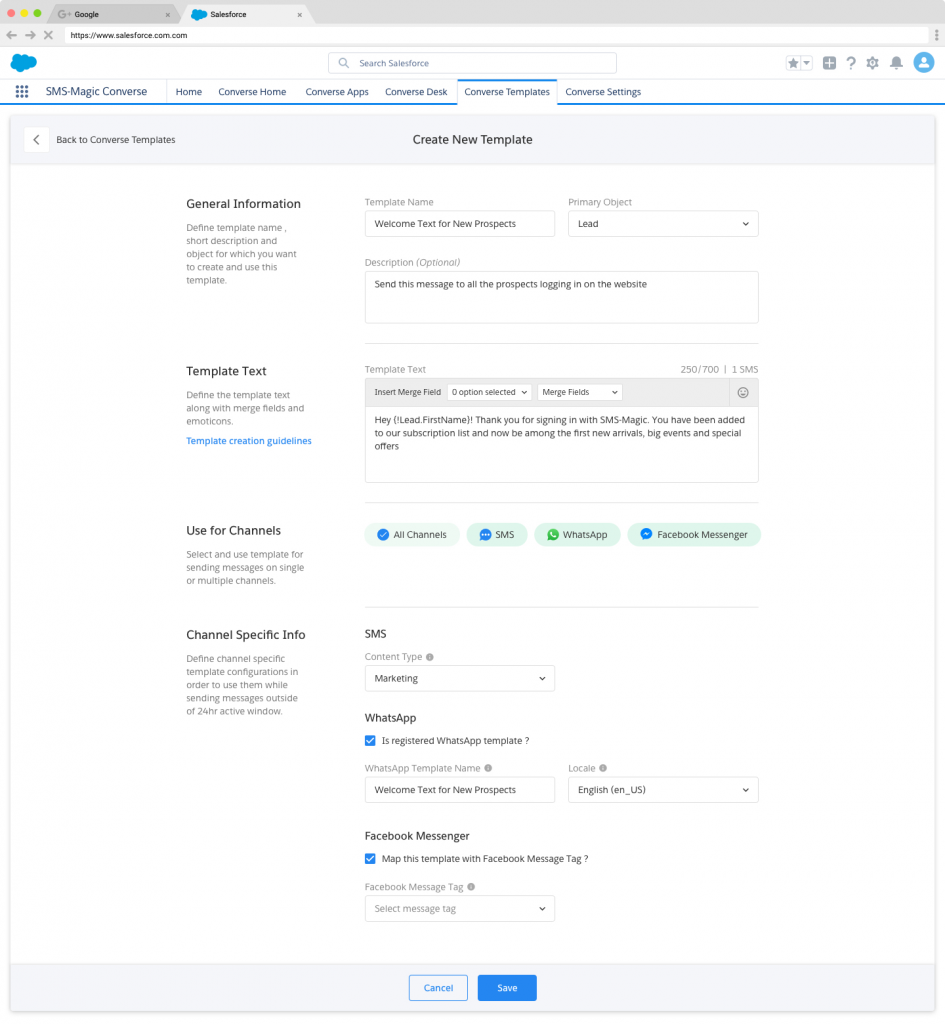
According to your use case, you can create templates and tag it to single/multiple/all channels. Once you tag a template to the WhatsApp channel, you will be asked to fill the channel-specific information along with the basic template information. Channel specific information will be only required while adding WhatsApp approved registered templates.
You can add non-registered templates as well just by tagging them with WhatsApp channel where channel-specific information won’t be required and these can be only used for sending WhatsApp session messages i.e. in the recipients 24 hr active window.
We will be tagging your existing templates with all channels so that you need not have to perform an additional step to use them for WhatsApp messaging.

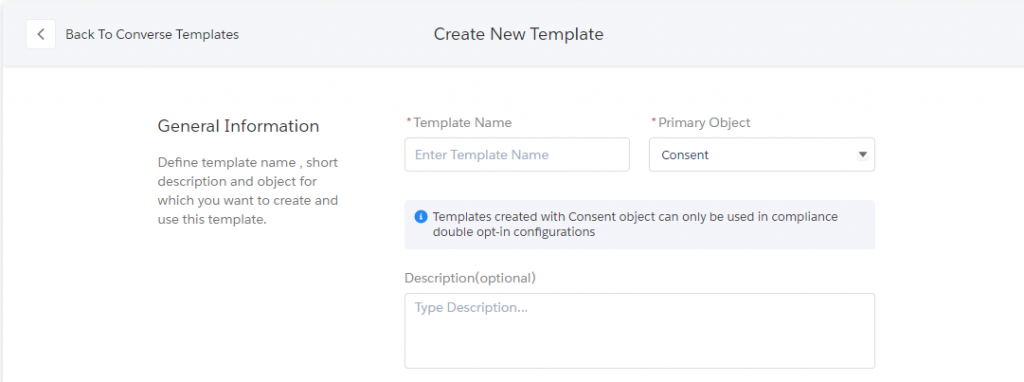
In case of creating double opt-in compliance configurations for WhatsApp, you will first have to create a template for the consent confirmation message. You must select the primary object as ‘Consent’ keeping the template text the same as WhatsApp registered template text. You can then select the created template while configuring double opt-in settings.

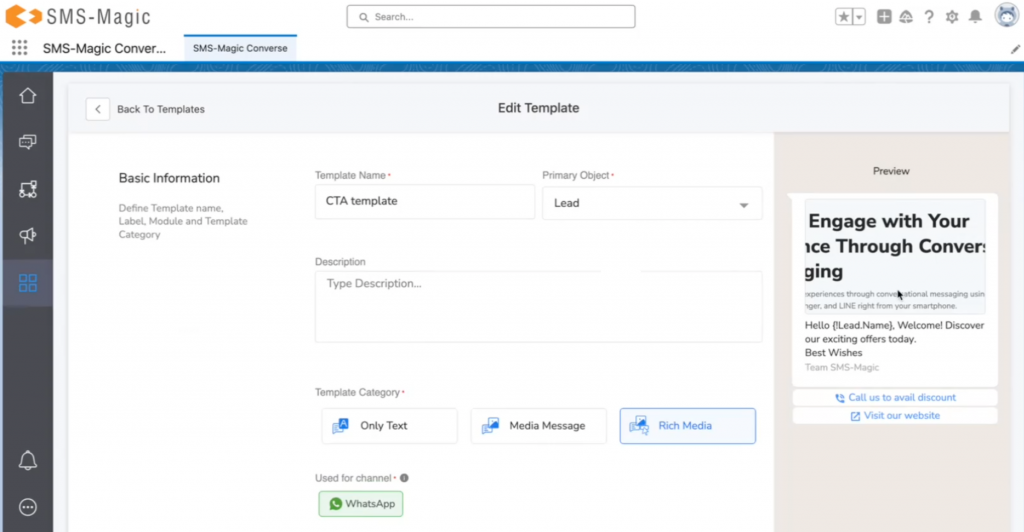
Note: Now, from version 1.73, you can create Rich media message templates. Select the template category as ‘Rich Media’ and select the channels from the list of channels. Rich media message templates allow users to use the WhatsApp functionalities like clickable buttons and call to action buttons. To know more, refer to this document.

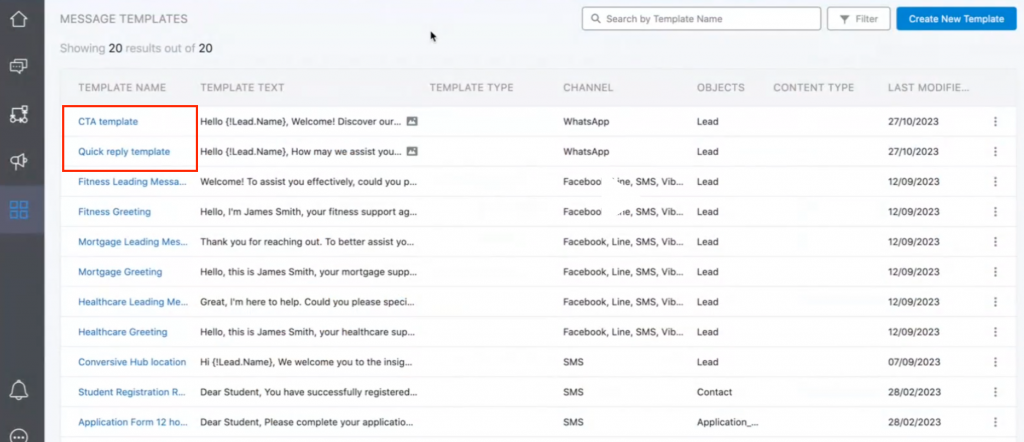
With Rich Media Templates, now you have the button templates in the form of CTA templates and quick reply templates, as highlighted in the image above.
CTA Templates
With the CTA templates, once you click on a button, you get redirected to a website link or a call.
Quick Reply Templates
Under this, you can have maximum up to three options. Once received on the consumer side, they can simply tap on the button and the label of the button will be send as a reply.

As you can see in the image above, in the preview, you have the button templates selected.


