Steps to Remove “Record Owner’s Sender Id” Option while Sending SMS
Important points to be noted before proceeding ahead:
- This option is available to delete only from SMS-Magic version 1.59 and onwards.
- Once deleted this option can’t be added again. The recommendation is to confirm the same with the customer before deleting this option.
Where is it used?
While sending SMS from salesforce org (through bulk SMS or automation/converse app), we get redirected to a page where we select sender ID, SMS template, etc. While selecting the sender ID, we can see there is one option called “Record Owner’s Sender Id” in the select sender ID dropdown.
How it works?
If we select this option while sending SMS, I will pick up whatever sender is assigned to the record owner.
Ex-: Let’s assume, There is 1 contact record with the name “ABC” and the owner of this contact record is “XYZ”. There is a sender ID with the name “Welcome” assigned to the owner of “ABC”. i.e. “XYZ”.
Now, if we send SMS to contact “ABC” (Where we’ve selected sender ID as “Record Owner’s Sender Id” option from the dropdown) the contact “ABC” will receive SMS with the sender ID “Welcome”.
To remove this option below are the steps:
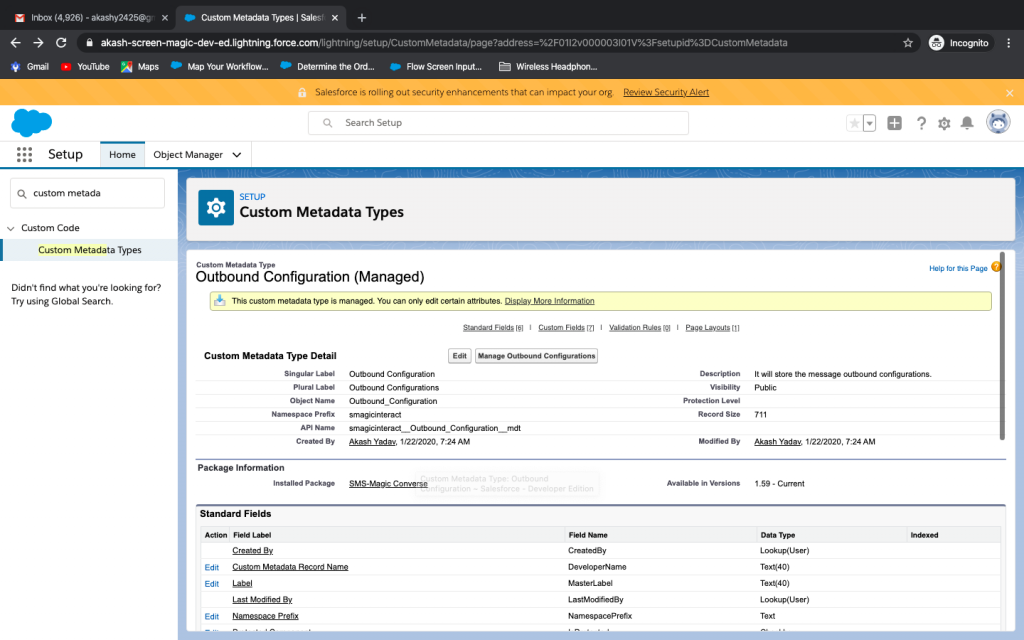
- Goto setup and search for “custom metadata types” from a quick find box and click on it.
- Click on “outbound configurations” from results.
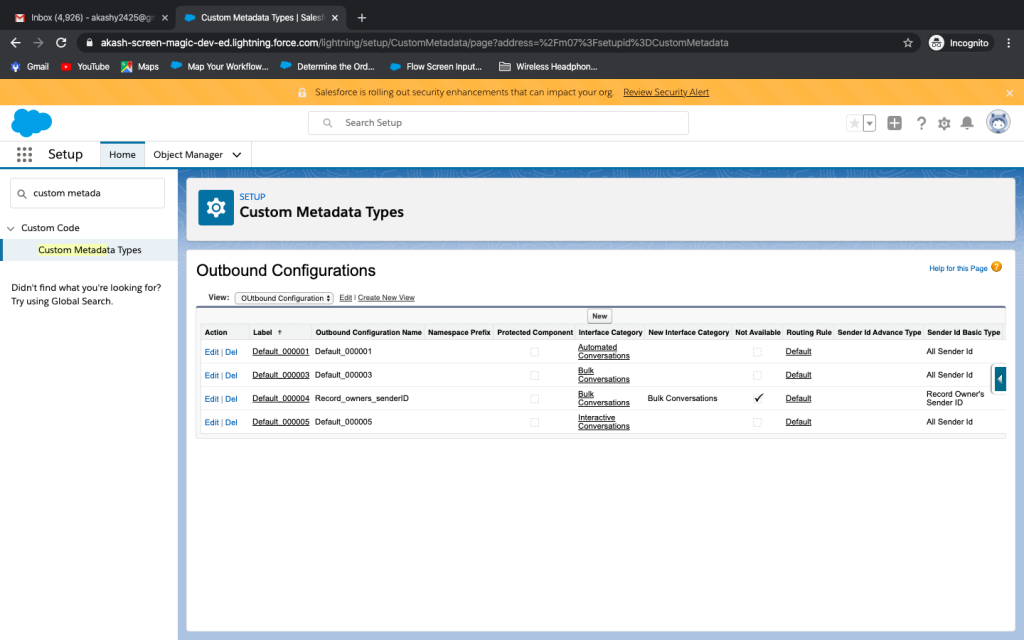
- Click “Manage outbound configurations”, you will see a list of options.
- Search (CMD+F) or look for “record owner’s sender ID” under “sender ID basic type column” and open the record.
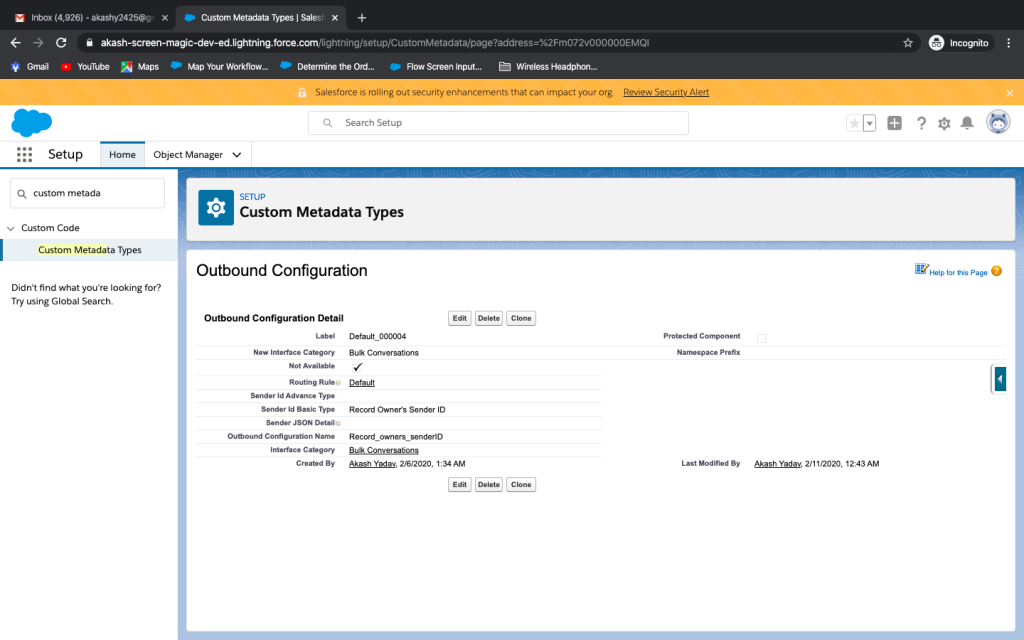
- You need to delete two records: 1 for bulk conversion and another for Automated Conversations.
- Check for the fields below to confirm if you are deleting the correct option: (if you don’t see below fields, add from edit page layout)
1. For Bulk Conversations:
- Outbound Configuration Name = Record_owners_senderID
- Interface Category = Bulk Conversations
- New Interface Category = Bulk Conversations
2. For Automated Conversations
- Outbound Configuration Name = Record_owners_senderID
- Interface Category = Automated Conversations
- New Interface Category = Automated Conversations
7. Click on delete. (Don’t forget to delete both records)
8. Below are the screenshots for reference:
Refer steps: 1, 2 and 3

Refer step: 4

Refer steps: 6 and 7


