Create Webhooks
A webhooks gives you the ability to communicate with a 3rd-party application by sending an instant web notification every time an event occurs.
Follow these steps to create a webhook:
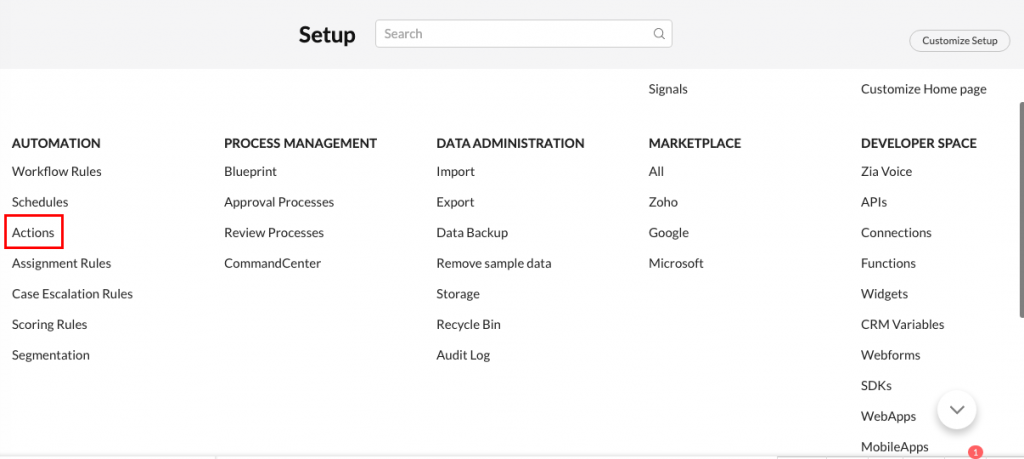
- In Zoho CRM, go to Setup and click on the ‘Actions’ sub-section in the Automation section
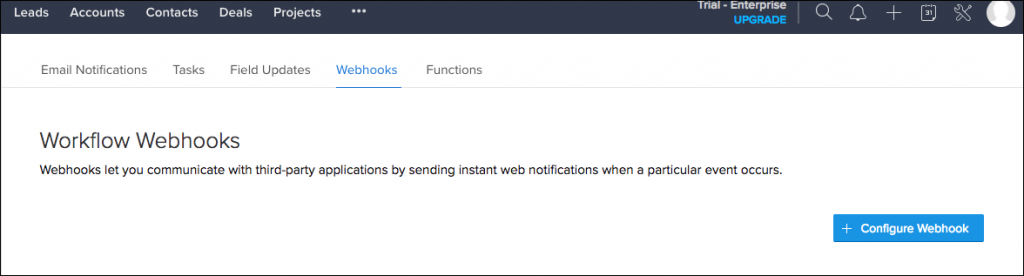
- Go to Webhooks and click on the Configure Webhook button
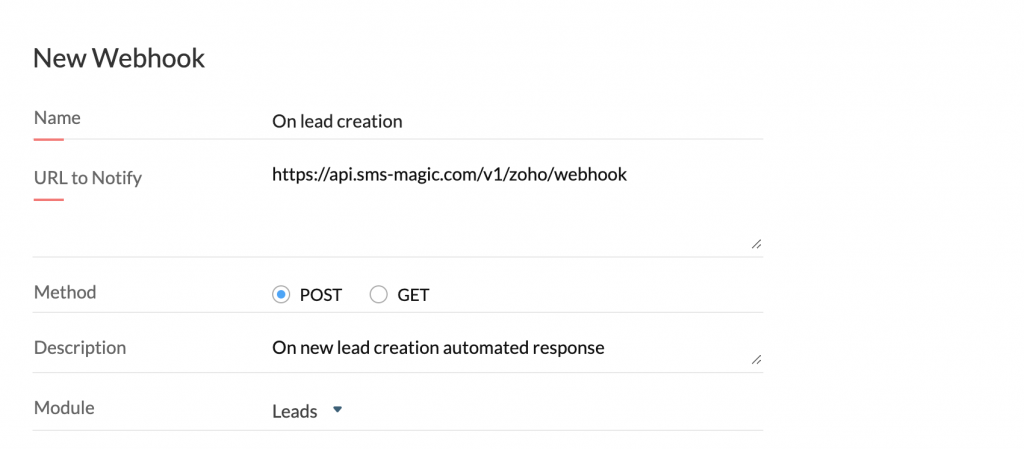
- Complete the New Webhook form:
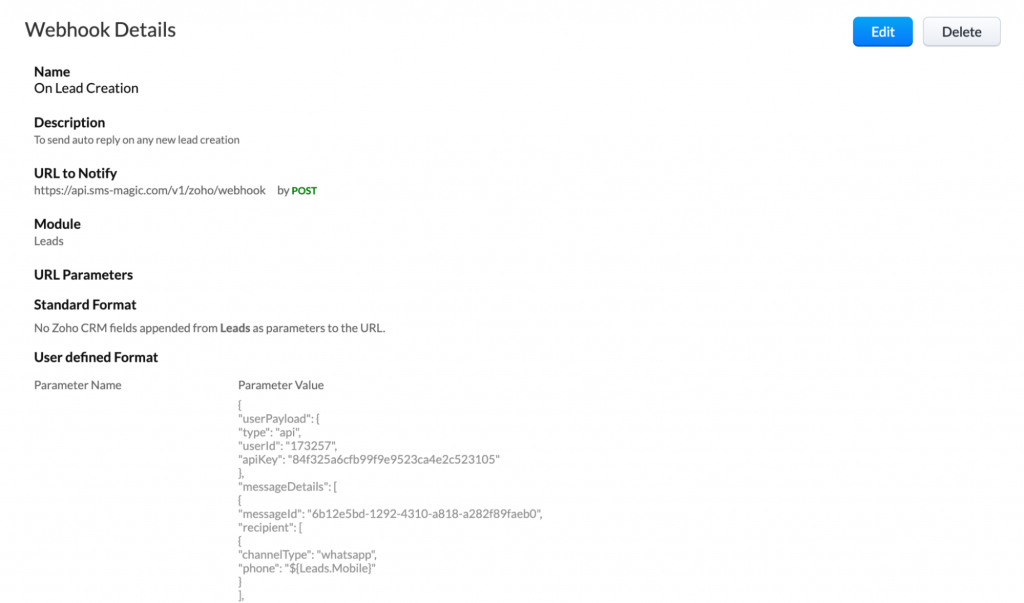
- Name: Type a name for the webhook
- URL to Notify:
Here is the URL you can use based on your data center-
US > https://api.sms-magic.com/v1/zoho/webhook
EU > https://eu.api.sms-magic.com/v1/zoho/webhook
AUS > https://aus-api.sms-magic.com/v1/zoho/webhook
- Method: Select POST
- Description: Briefly state the purpose of the webhook
- Module: Select the module for which you want to Automate and ensure it matches with the module chosen in the JSON Payload.
- URL Parameters: Click on the Add Parameter under User Defined Format. Enter the Parameter Name = text. For the Description, copy and paste the JSON payload configuration that you saved in the Generate JSON step above.

- Click on the Save button and your webhook is now ready to be used in a Workflow rule.